Audio Journalism:
- “Painting sound pictures for listeners is a skill that takes practice.”
- Digital tools make audio easy for one person to master
- People often listen to audio journalism while commuting or spending time alone
- “An audio journalist can create a more intimate and personal relationship with the listener and take advantage of that”
Why audio journalism is important: “it is the dominant form of information distribution on The Next Big Thing in Journalism: mobile journalism”
Characteristics unique to audio journalism:
- Presence: being on location boosts credibility + interest
- Emotions: message enhanced by tone of voice, expressions, intonation + pauses
- Atmosphere: natural sound pulls listener in close
By combining voice-overs, natural sound and sound effects (for transitions), you build a multidimensional story.
How news organizations use audio:
- Reporter overview: quick, simple audio overviews by reporters that accompany their newspaper articles
- Podcasts: regular episodes on a selected subject help build an audience
- Audio slide shows: adding audio to images creates richer, more compelling stories
- Breaking news: Briggs says with free services like Utterli.com, a reporter can file a quick audio report from anywhere by mobile phone, to be published on a Web site; Utterli.com has since been purchased by Twitter.com
Get started with audio — plan and prepare:
- Recording interviews: interview can be used as a stand-alone audio file with a news story, a podcast, a stand-alone audio file for a blog post, and an audio to accompany a photo slide show
- Choose your location: best to record interview face-to-face in quiet place with good accoustics; if outside, stay as far away as possible from traffic and crowds; if phone is only option, try to keep interview focused, then edit down to most notable points
- Gather natural sound: record natural sound in uninterrupted 15-second increments without anyone talking; helps describe setting; can be used in editing
- Prepare your subject so you’ll both be clear on the basics
- Watch what you say: keep quiet while subject is talking; use nonverbal clues, like nodding, to let them know you’re listening and understanding
- Try delayed recording: conduct interview, then ask subject to speak again about a couple of the most notable points while you start recording
- Mark the best spots: where the speaker said the best stuff; saves lots of time back at the office
Doing voice-overs:
- Write a script: use short, simple declarative sentences and a compelling hook; put best quote up front; avoid long words; allow some moments of silence
- Warm up: stretch muscles in face and mouth + hum or sing; facial muscles and vocal cords need to be ready to perform
- Find operative words: usually who-what-where-when-why-how words; use changes in volume, pitch, rhythm and tempo to emphasize them
- Keep it conversational
Gear up and get out there:
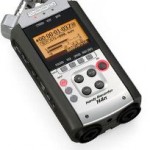
- Choose a digital recorder: consider recording quality, digital file format and compatibility with your computer, ease of use and ease of transfering files; consider only recorders that have external inputs for mic and headphones
- Start interviews by asking, while the recorder is running, “OK if I tape this?”
- Record with your computer:
1. File name: use a standard file-naming convention; create new folders by
year or month for more organization
2. Format: record in WAV format so files are uncompressed + of the
highest quality; can convert to MP3 once they’re edited for publishing on
the Web
3. Input/mic level: make sure software is set to capture data via microphone
input; set microphone level to about 70 percent
- Use an external mic:
1. Standard mic with a cord: helpful if interviewing more than one person at a time or if you want to include your own voice on the audio clip; best way to gather natural sound
2. Wireless or lavalier mic: most helpful in the field to capture the voice and words of one person
- Use headphones: plug in and listen while you record to be sure you’re recording good audio
- Prepare before you go out: test everything before trying to use it on assignment; be prepared for worst-case scenarios
Editing digital audio: goal is to record with highest quality possible, then edit files before compressing to publish and distribute online
- Understand digital formats:
1. Different formats use different codecs that create specific types of files which work only on specific players or devices
2. Goal should be to provide audio clips for your audience in MP3 format because virtually any computer can play an MP3 and MP3 strikes the best balance between high quality and file size
- Get ready to edit: many basic programs are free, like Audacity
- Try advanced editing techniques:
1. Fade: gradual increase or decrease in audio level
2. Cross-fading: one track level increasing while another decreases
3. Establishing music: set tone with song clips
4. Segue: smooth transition from one track to another
5. Transition: smooth and natural connection of different tracks
Start podcasting (iPod + broadcast):
1. Podcasting — the distribution of audio files over the Internet using RSS subscription
2. Files can be downloaded to mobile devices or played on pcs
3. Podcast usually features one type of “show,” with new episodes available either sporadically or at planned intervals
- Vodcasting (video + podcasting): podcasting with video files
- With iTunes, finding and listening to podcasts is simple:
1. Click the Podcasts link in the left menu, then click Podcasts directory on the bottom of the screen
2. Search by category or by most popular
3. Click Subscribe and it will automatically update when there’s new content

 Entries (RSS)
Leave a Reply